Home garden office - Self build - Part 1: Design
We are having a baby soon! That and the likelihood that I will continue to need a room to work from home, we decided that it was worth looking at getting a garden office, if it can be done within a budget. Both pre-made off-the-shelf buildings, and custom built ones are quite pricey. If we are talking about something insulated with electrics, windows, doors all set up and built, the cheapest I have found is > £12000. Self build however I am managing to squeeze everything in at £4500, a huge saving. It's an undertaking I'm heading into somewhat blindly as I don't personally know anyone who has built anything like this - but I'm pretty optimistic now I've done my research. I have been inspired by similar projects here and here.
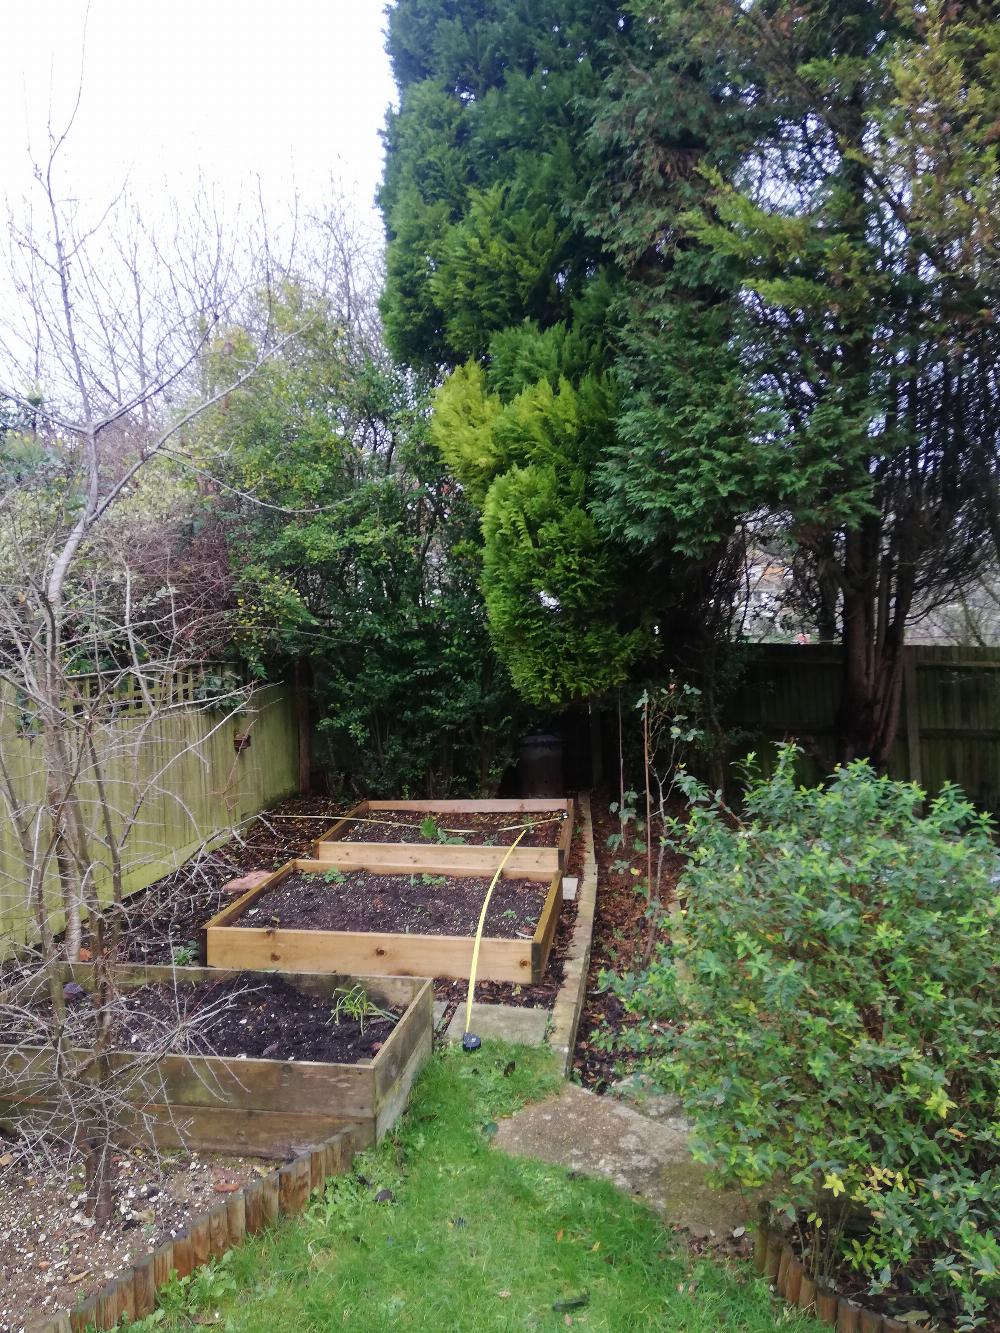
The plot
The plot of land has space for roughly 12 by 8 feet building. I will need to move some raised beds which are there and probably cut back a bit of the cedar tree that is overhanging the area. In the photo I have laid out tape measures to give a rough look at the size.
Design stage
It’s taken a lot of time to research all of the sensible options, but I finally settled on some initial design decisions, together with rough costs:
- Foundations: Ground screws = £900
- Structure: SIPS ≈ £1300
- Roof: EPMD (Rubber roof) = £235
- Windows / Doors: Black PVC ≈ £1200
- Cladding: Cedar ≈ £750
Extra costs I've factored in such as housewrap, tools etc should be < £200. These are not the absolute cheapest options (e.g. cedar cladding is not cheap) - but they seem to go well together in other buildings I’ve seen. I will be spending a good deal of time trying to see if I can save money on the cladding and windows on ebay...
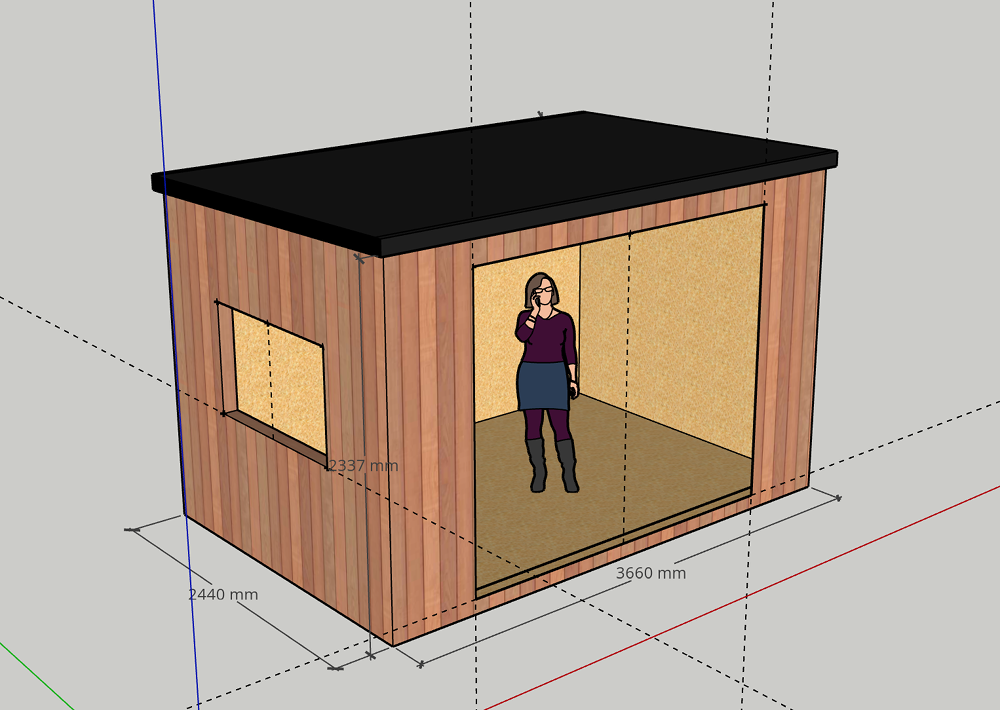
I made a mockup of the building in sketch up, I'm not actually sure how useful this will be at the building stage, but it was helpful as an activity consolidating my thoughts on everything.
Foundations
Deciding on the foundations took the longest amount of research. The most expensive but most permanent and stable foundation, would be the concrete slab: First you dig a hole, fill it with hardcore and sand, compact it then lay a nice flat layer of concrete over the top, covering the entire area of the building. Another advantage of this is that it can double as the floor itself. A variation of this would be to tile the area with paving slabs. Both the above options require a lot of cement, and the expertise with it, but likely would produce the most professional results - the costs looked double or more for the others on first glance, so I ruled them out fairly on.
The cheapest and most DIY seemed to be pad or plinth foundations, which involves digging a number of holes, filling with hardcore and sand and mortaring cinderblocks to provide a level framework of blocks to lay the floor on. This seems to require a fair amount time and effort, but costs very little, and apart from some difficulty getting the blocks level, seemed straightforward. I found many youtube videos (e.g. https://www.youtube.com/watch?v=Hyfbb2FRkV8) demonstrating how to do it, however for my particular plot with clay and trees surrounding, I was a little worried that it might not be as permanent as I would like, however it was my fallback option. My plan was to seek further advice if I couldn’t use ground screws.
Ground-screws are massive screws that go into the ground and hold the building above the ground. They can be done diy (which would make them the cheapest option), but you’d have to be pretty sure you wouldn't hit any rock, I’m planning on going with a local company to install mine, apart from the electrics, it should be the only outside help I will received on site. After laying the ground-screws its best to cover the rest of the soil with weed membrane at the very least, to protect the underside of the building.
Structure
The other major decision came about when I learnt about SIPS. When I began the project I was imagining that I would be building everything from timber frames. This would involve a lot of precise cutting and measuring, filling with insulation etc - which I was fully prepared to do until I discovered SIPS. SIPS meaning structural insulated panels, are a kind of more like modern building lego. You buy a bunch of SIPS panels cut them and join them together and you have a building. Again, it costs more than the traditional way, but not by much. I estimated I will be spending £400 to gain probably 4 full days of work or more (not counting all the mistakes I am likely to make, and the extra time planning). The other major benefit of SIPS is that they are typically much better insulated than timber frame, the insulation spans the whole panel so there are no gaps where the beams would be.
Other design decisions
The rest came about from browsing for other sheds, and although I noticed some really nice rustic looking buildings with reclaimed wood, it looked like a lot more work to actually source the materials, and having no experience in designing with these materials (or any materials), I felt it would run the risk of just looking bad. Better to go with something I can copy more easily! There are many nice looking cheap cladding and roofing options, but I decided to go with the trend of having cedar cladding with black/grey fittings and rubber roof. I haven’t really looked too much into shed felt, as I like the look of it less than the EPMD. I think the difference in cost is minimal, but from what I’ve gathered it’s slightly more tricky to put the rubber roof on, but I think it looks pretty good with the PVC. I originally wanted wooden doors/windows, but I haven’t found any thus far that are near as cheap as the PVC.
Next steps...
Next is pulling the trigger, and ordering everything and building it! Baby is due in roughly one month, and my aim will be to begin building a month after that. I will be switching to a 4 day week after baby is born, meaning I should have a few spare afternoons per week to work on it.